Cheapest way to make a patio on grass – Budget Outdoor Upgrade
When you’re looking for the cheapest way to make a patio on grass, a low‑cost DIY method for turning a grassy area into a functional outdoor living space. Also known as budget grass patio, it lets homeowners enjoy a solid surface without ripping up the entire lawn.
Most people start by asking why they should bother with a patio at all. The answer is simple: a flat, stable surface expands your usable yard, gives a place for chairs, grills, or a kids' play area, and protects the grass underneath from foot traffic. The cheapest approach leans on what you already have – the existing lawn – and adds a thin, supportive layer that spreads weight evenly. This method avoids the huge excavation costs that come with a traditional concrete slab.
One of the star players in this project is interlocking pavers, affordable, modular stone pieces that lock together to create a stable patio surface. They work like Lego for outdoors: you lay them over a compacted base, and they stay put without mortar. Because each piece is lightweight, you can handle them yourself, which keeps labor costs at zero. Another budget‑friendly option is reclaimed concrete slabs found at local dump sites; they’re heavier but equally cheap.
Step‑by‑step cost‑saving plan
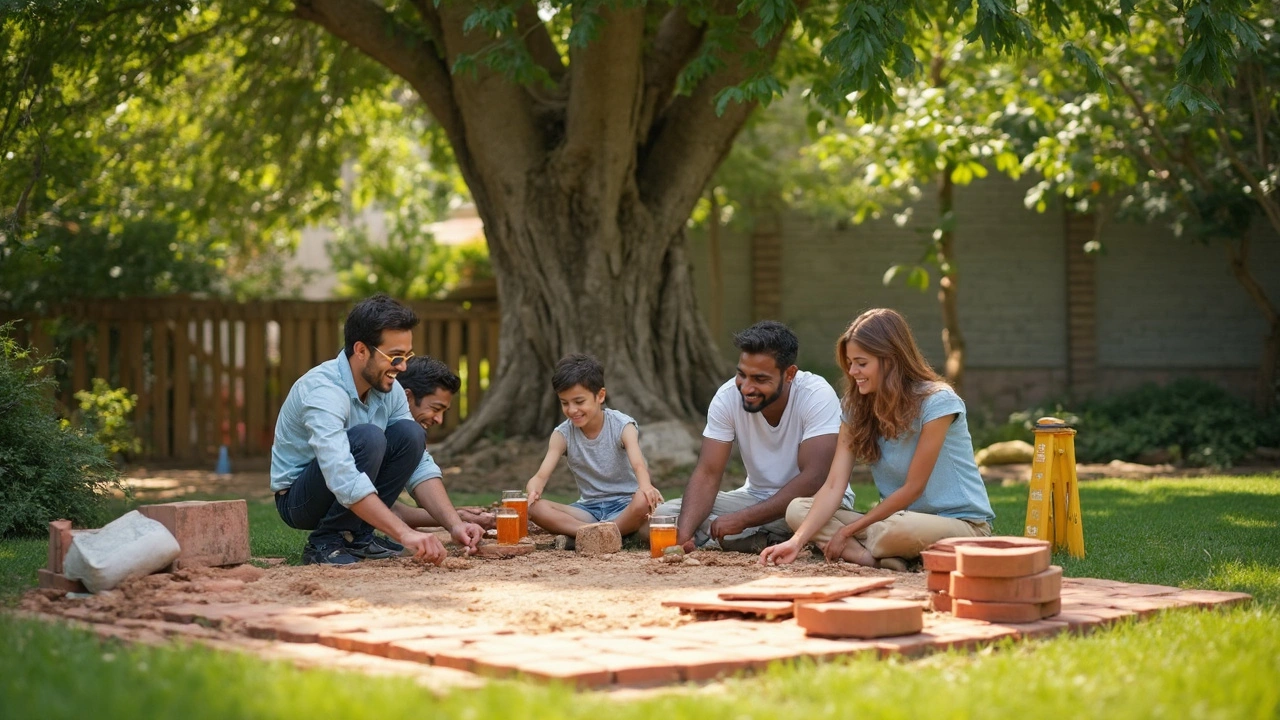
First, measure the area you want to cover. Knowing the square footage helps you calculate exactly how many pavers or slabs you need, preventing waste. Next, mark the perimeter with a garden hose or string. This visual guide lets you see the shape before you start digging.
Then comes the base preparation. A thin layer of crushed stone or sand – often sold by the bag at hardware stores – works as a leveling medium. Spread it about an inch thick and compact it with a hand tamper or a rented plate compactor. This step is crucial because a stable base reduces the chance of pavers shifting and extends the life of your patio.
After the base, lay your landscaping fabric, a permeable sheet that stops weeds while allowing water to drain under the pavers. The fabric adds another cheap layer of protection and cuts down on future maintenance. It also keeps the grass from poking through the gaps.
Now, start placing the pavers. Begin at a corner and work outwards, keeping a tight joint width – usually a quarter inch. Use a rubber mallet to tap each piece level with the ones next to it. If you notice any low spots, add a bit more sand underneath before you hammer it down. Once the whole area is covered, sweep sand into the joints; this sands them up and locks the pieces in place.
Finally, seal the patio if you want extra durability. A simple clear sealant spray costs under $20 and helps resist stains from spills or rain. Even if you skip sealing, the patio will hold up for years because the cheap materials and proper base do most of the heavy lifting.
What you get at the end is a functional, attractive patio that costs a fraction of a traditional build. Below you’ll find a selection of articles that dive deeper into each step, share real‑world cost breakdowns, and suggest creative tweaks like adding a fire pit or container garden. Whether you’re a seasoned DIYer or a first‑timer, the ideas here will give you the confidence to start your own budget patio on grass today.