Picture Hanging Height Calculator
Calculate Your Picture's Hanging Height
Enter your frame's height below to get the precise placement for a professional look.
Your Picture Should Be Hung At:
This is the height from the floor to the top edge of your frame for proper placement at eye level.
How to Apply This Measurement
Step 1: Measure 57 inches (145 cm) from the floor and mark this point.
Step 2: From that mark, measure up half your frame's height and make your final mark.
Step 3: This new mark is where you'll place your hanging hardware.
Ever stare at a blank wall, slap a frame on it, and feel something’s just off? You’re not imagining it-there’s a science to hanging pictures that most people skip. In this guide we’ll break down the exact rule for picture hanging, walk through the tools you need, and show you how to make any wall look gallery‑ready without guessing.
Why Placement Matters
Good placement does more than please the eye; it influences how a room feels. A correctly positioned piece can make a space feel taller, cozier, or more balanced. Conversely, a mis‑aligned frame draws attention for the wrong reasons, making the room feel disjointed.
The Core Rule: Eye‑Level & the 57‑Inch Guideline
Picture hanging is the practice of positioning artwork, photos, or decorative frames on a vertical surface. The most widely accepted rule says the center of the artwork should sit about 57 inches (145cm) from the floor. This height matches the average eye level for a standing adult, creating a natural viewing line.
Why 57 inches? A study by the University of Kansas measured eye level across a sample of 2,000 adults and found the average stood at 57-58 inches. When artwork aligns with this line, viewers don’t have to look up or down, reducing neck strain and making the piece feel anchored.
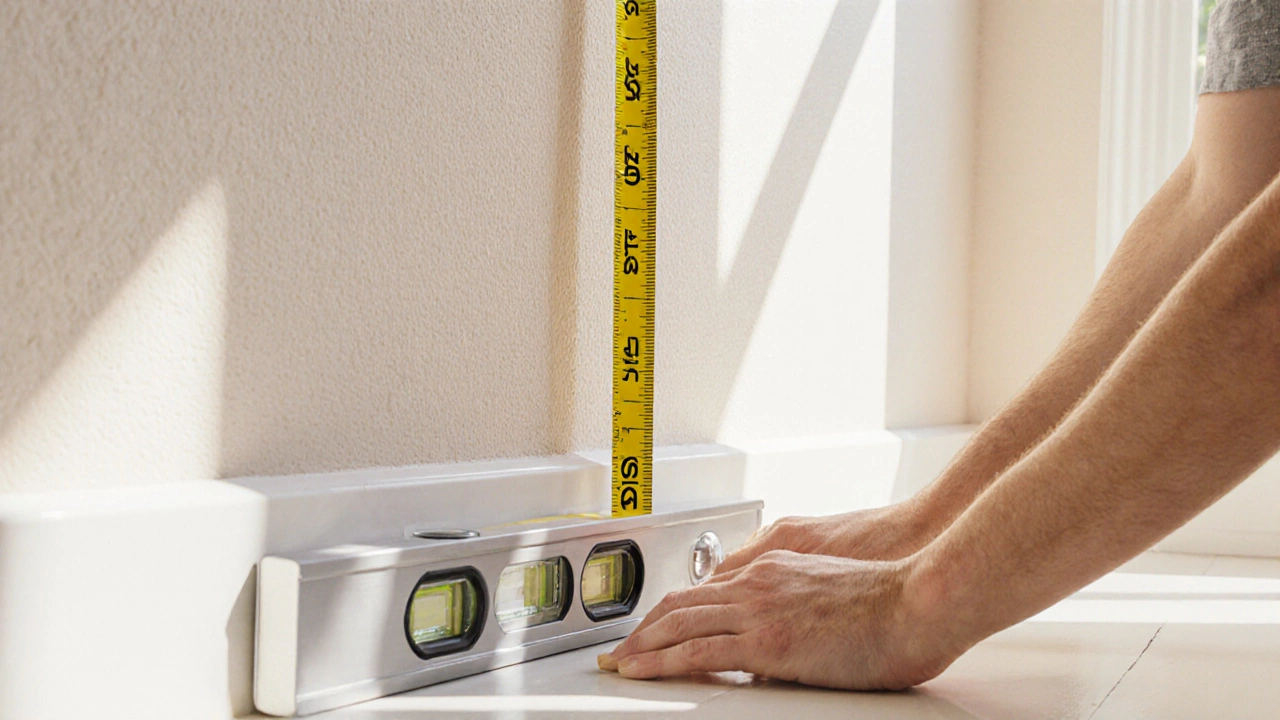
Measuring and Marking: Step‑by‑Step
- Gather your tools: a measuring tape, a pencil, a level, and a stud finder (optional).
- Measure 57 inches from the floor up the wall. Mark this spot lightly with a pencil.
- Determine the height of your frame. If the frame is 24 inches tall, the center is 12 inches from the top edge.
- From the 57‑inch mark, measure upward half the frame’s height (12 inches in this example) and make a second pencil mark. This is where the top of the frame will sit.
- Use a level to ensure the mark is perfectly horizontal. Adjust as needed.
- Place a small piece of painter’s tape at the mark; it will guide your hardware placement.
Choosing the Right Hanging Hardware
The hardware you pick depends on the weight of the piece, wall material, and how often you plan to move it. Here’s a quick comparison:
| Hardware | Weight Capacity | Wall Types | Installation Effort |
|---|---|---|---|
| Nail & Hook | 5‑25lb | Drywall, plaster | Low |
| Picture Hook (Saw‑tooth) | 2‑10lb | Drywall, panel | Very low |
| Adhesive Strips | 1‑5lb | Drywall, smooth surfaces | Zero |
| Picture Rail | Up to 50lb per hook | All (requires rail installation) | Medium (install rail once) |
| Stud‑Mounted Bracket | 50+lb | Stud walls, concrete | Medium‑high |
For most home décor, a simple nail with a hanging hook works fine. If you have a delicate frame, adhesive strips avoid wall damage. Large mirrors or heavy canvases benefit from a stud‑mounted bracket.
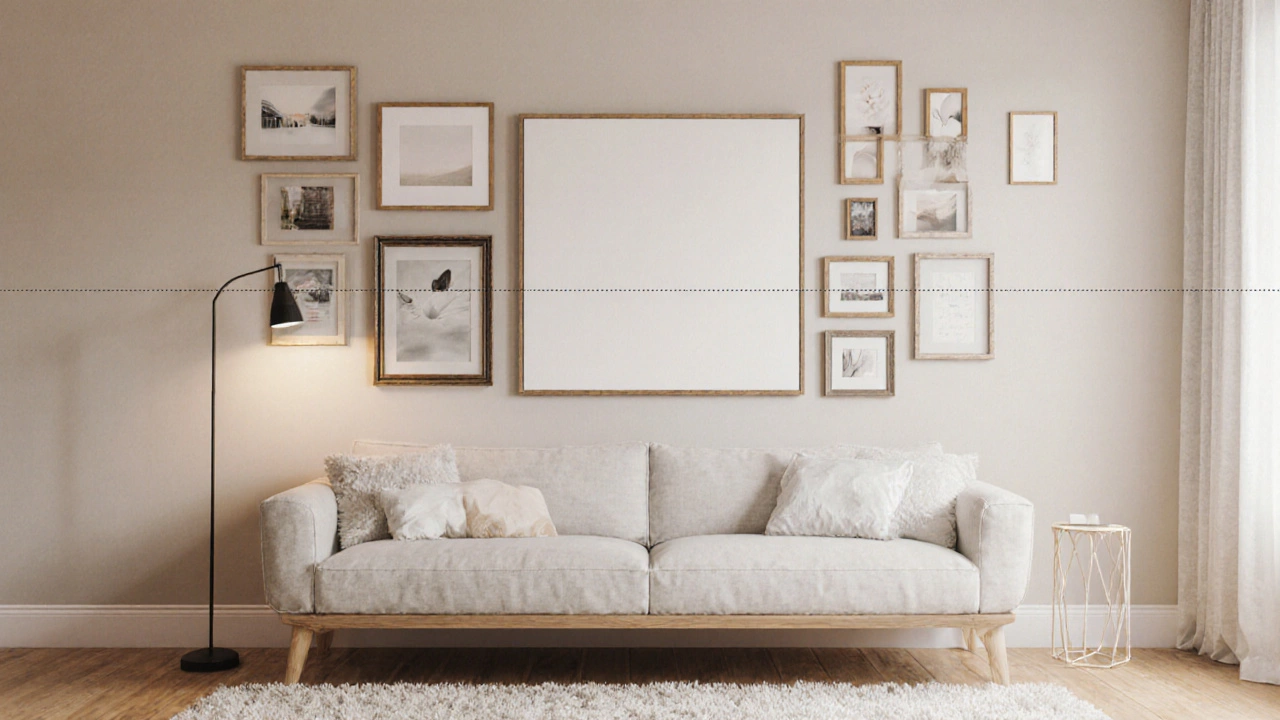
Spacing Multiple Frames: The Gallery Wall Rule
When you’re arranging a collection-say, a gallery wall-you’ll need a different set of guidelines. The key is consistent spacing and visual balance.
- Uniform Gap: Keep the distance between frames consistent, typically 2-3 inches for small groups, 4-6 inches for larger arrangements.
- Center Line: Treat the entire collection as a single “picture” and apply the 57‑inch rule to its center.
- Mock Layout: Lay the frames on the floor first or use newspaper cut‑outs taped to the wall to experiment with composition before drilling.
A gallery wall is essentially a visual puzzle. Start with the largest piece, position it at eye level, then fill in around it, constantly stepping back to check the overall shape.
Special Cases: Large Pieces & Hanging Over Furniture
Large artworks (over 36 inches wide) benefit from two hooks to prevent sagging. Measure the distance between the hooks on the frame’s back, then mark two points on the wall at the same distance, ensuring they’re level.
When hanging above furniture, treat the top of the furniture as a secondary baseline. A common rule is to place the bottom of the frame 6-12 inches above the piece of furniture, depending on ceiling height and visual weight.

Common Pitfalls and Pro Tips
Pitfall 1: Ignoring the wall’s texture. Rough plaster can shift a nail over time. Use a wall anchor or picture rail for added stability.
Pitfall 2: Forgetting to level. Even a slight tilt looks off. Double‑check with a level after each placement.
Pro Tip: Use a stud finder to locate studs for heavy pieces. If studs are unavailable, toggle bolts work well on brick or concrete.
Pro Tip: For rental apartments, adhesive strips rated for picture hanging are the safest way to avoid nail holes.
Pro Tip: Lightly rub a small amount of masking tape over the back of the frame where the hook will sit. This prevents slipping on smooth surfaces.
Quick Checklist Before You Hang
- Measure 57 inches from floor, mark center.
- Determine frame height; mark top edge.
- Choose appropriate hardware based on weight.
- Level all marks.
- Test placement with paper template.
- Install hardware, then hang.
- Step back, adjust if needed.
Frequently Asked Questions
What height should I hang a picture above a sofa?
Place the bottom of the frame 6‑12 inches above the sofa back. This keeps the artwork within the viewing zone while allowing the sofa to remain the room’s anchor.
Can I use nails on plaster walls?
Yes, but pre‑drill a small pilot hole with a masonry bit, then insert a wall anchor before the nail. This reduces cracking.
How do I create a balanced gallery wall without a ruler?
Cut newspaper rectangles to match each frame’s dimensions, tape them to the wall, and step back. Adjust spacing until the overall shape feels right, then replace the paper with the real pieces.
What’s the safest way to hang a heavy mirror in a rental?
Use adhesive picture‑hanging strips rated for at least twice the mirror’s weight, and combine with a removable hook that screws into a stud if possible. Always test the hold before relying on it.
Do I need a level for each piece in a gallery wall?
Yes. Even a small tilt becomes noticeable when multiple frames sit side by side. Use a laser level for large walls or a standard bubble level for each mark.
Armed with these rules, you’ll turn any empty wall into a curated showcase. No more guessing, no more crooked frames-just a clean, balanced look that makes your space feel intentional.